May 15, 2023
At loooong last, the Makeup air duct for the Commercial sized Kitchen Exhaust hood is functioning! This was a bit much for a regular HVAC guy to do, so Martin had to put his engineer hat on and design the control system to make it all work.
The real difficulty of making it all work is that the system consists of:
1. The 14” duct from the house return air to the outside
2. A damper so that when the hood is off, we’re not pulling in air from the outside
3. A 10 KW inline duct heater. Yep, that is a big heater, its 240 V and has to have a 50 amp breaker
4. An inline duct booster fan
5. Only one circuit was used for both the Hood Lights and the Exhaust fan. Therefore we had to use a current-sensing relay to determine when the Exhaust fan was on.
6. A Control by Web X410 controller to make everything work.
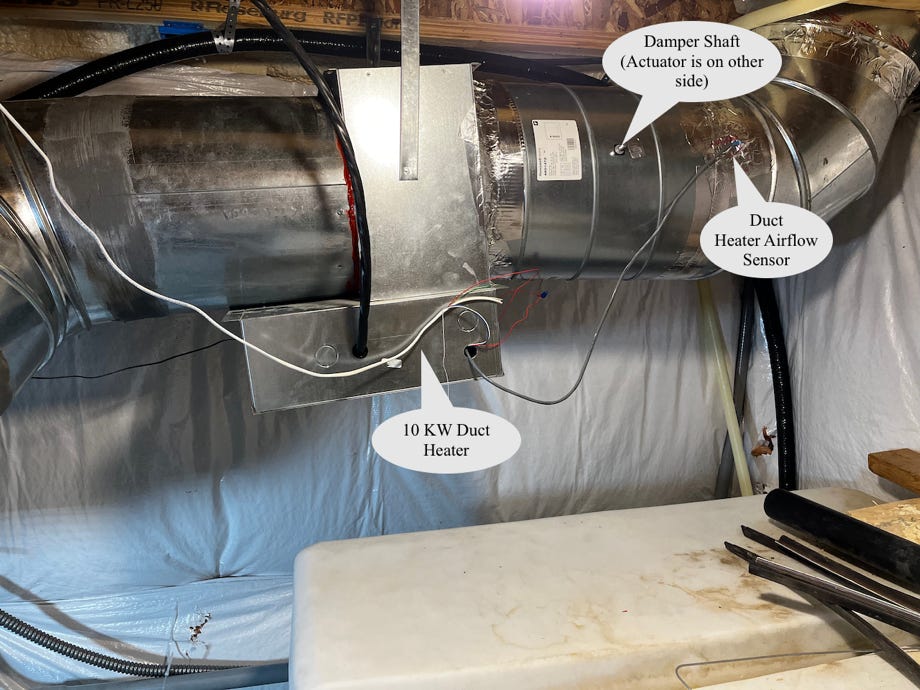
Here’s the 1st part of the duct, with the outside air entering at the right side. The Duct heater is actually quite smart, using an airflow sensor to make sure it’s got enough air going thru it to safely turn on the enormous heating coils.
The damper only opens when needed so we’re not constantly heating cold winter air or cooling hot summer air. It is nice to be able to pull in outside air to freshen up the house whenever we want to!
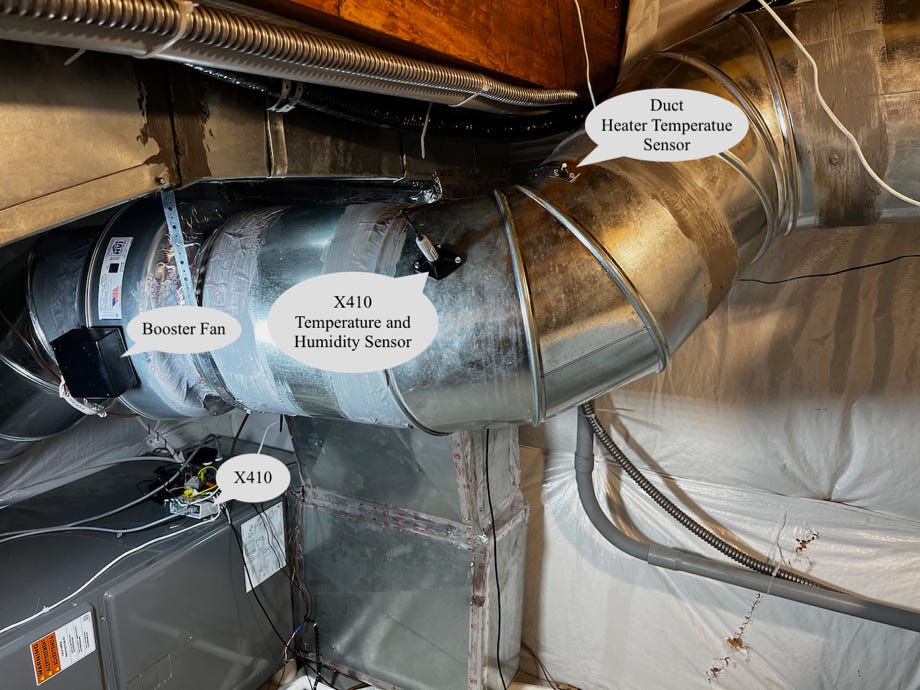
Here’s the 2nd part of the duct, with the heater just off the right side of the picture. Now we can see the 2nd sensor the smart duct heater has, a temperature sensor downstream from itself. If the temperature gets too high, it’ll shut itself down.
You can see the X410 controller’s sensor, the booster and the X410 controller itself.
Click on Image to download full sized picture.
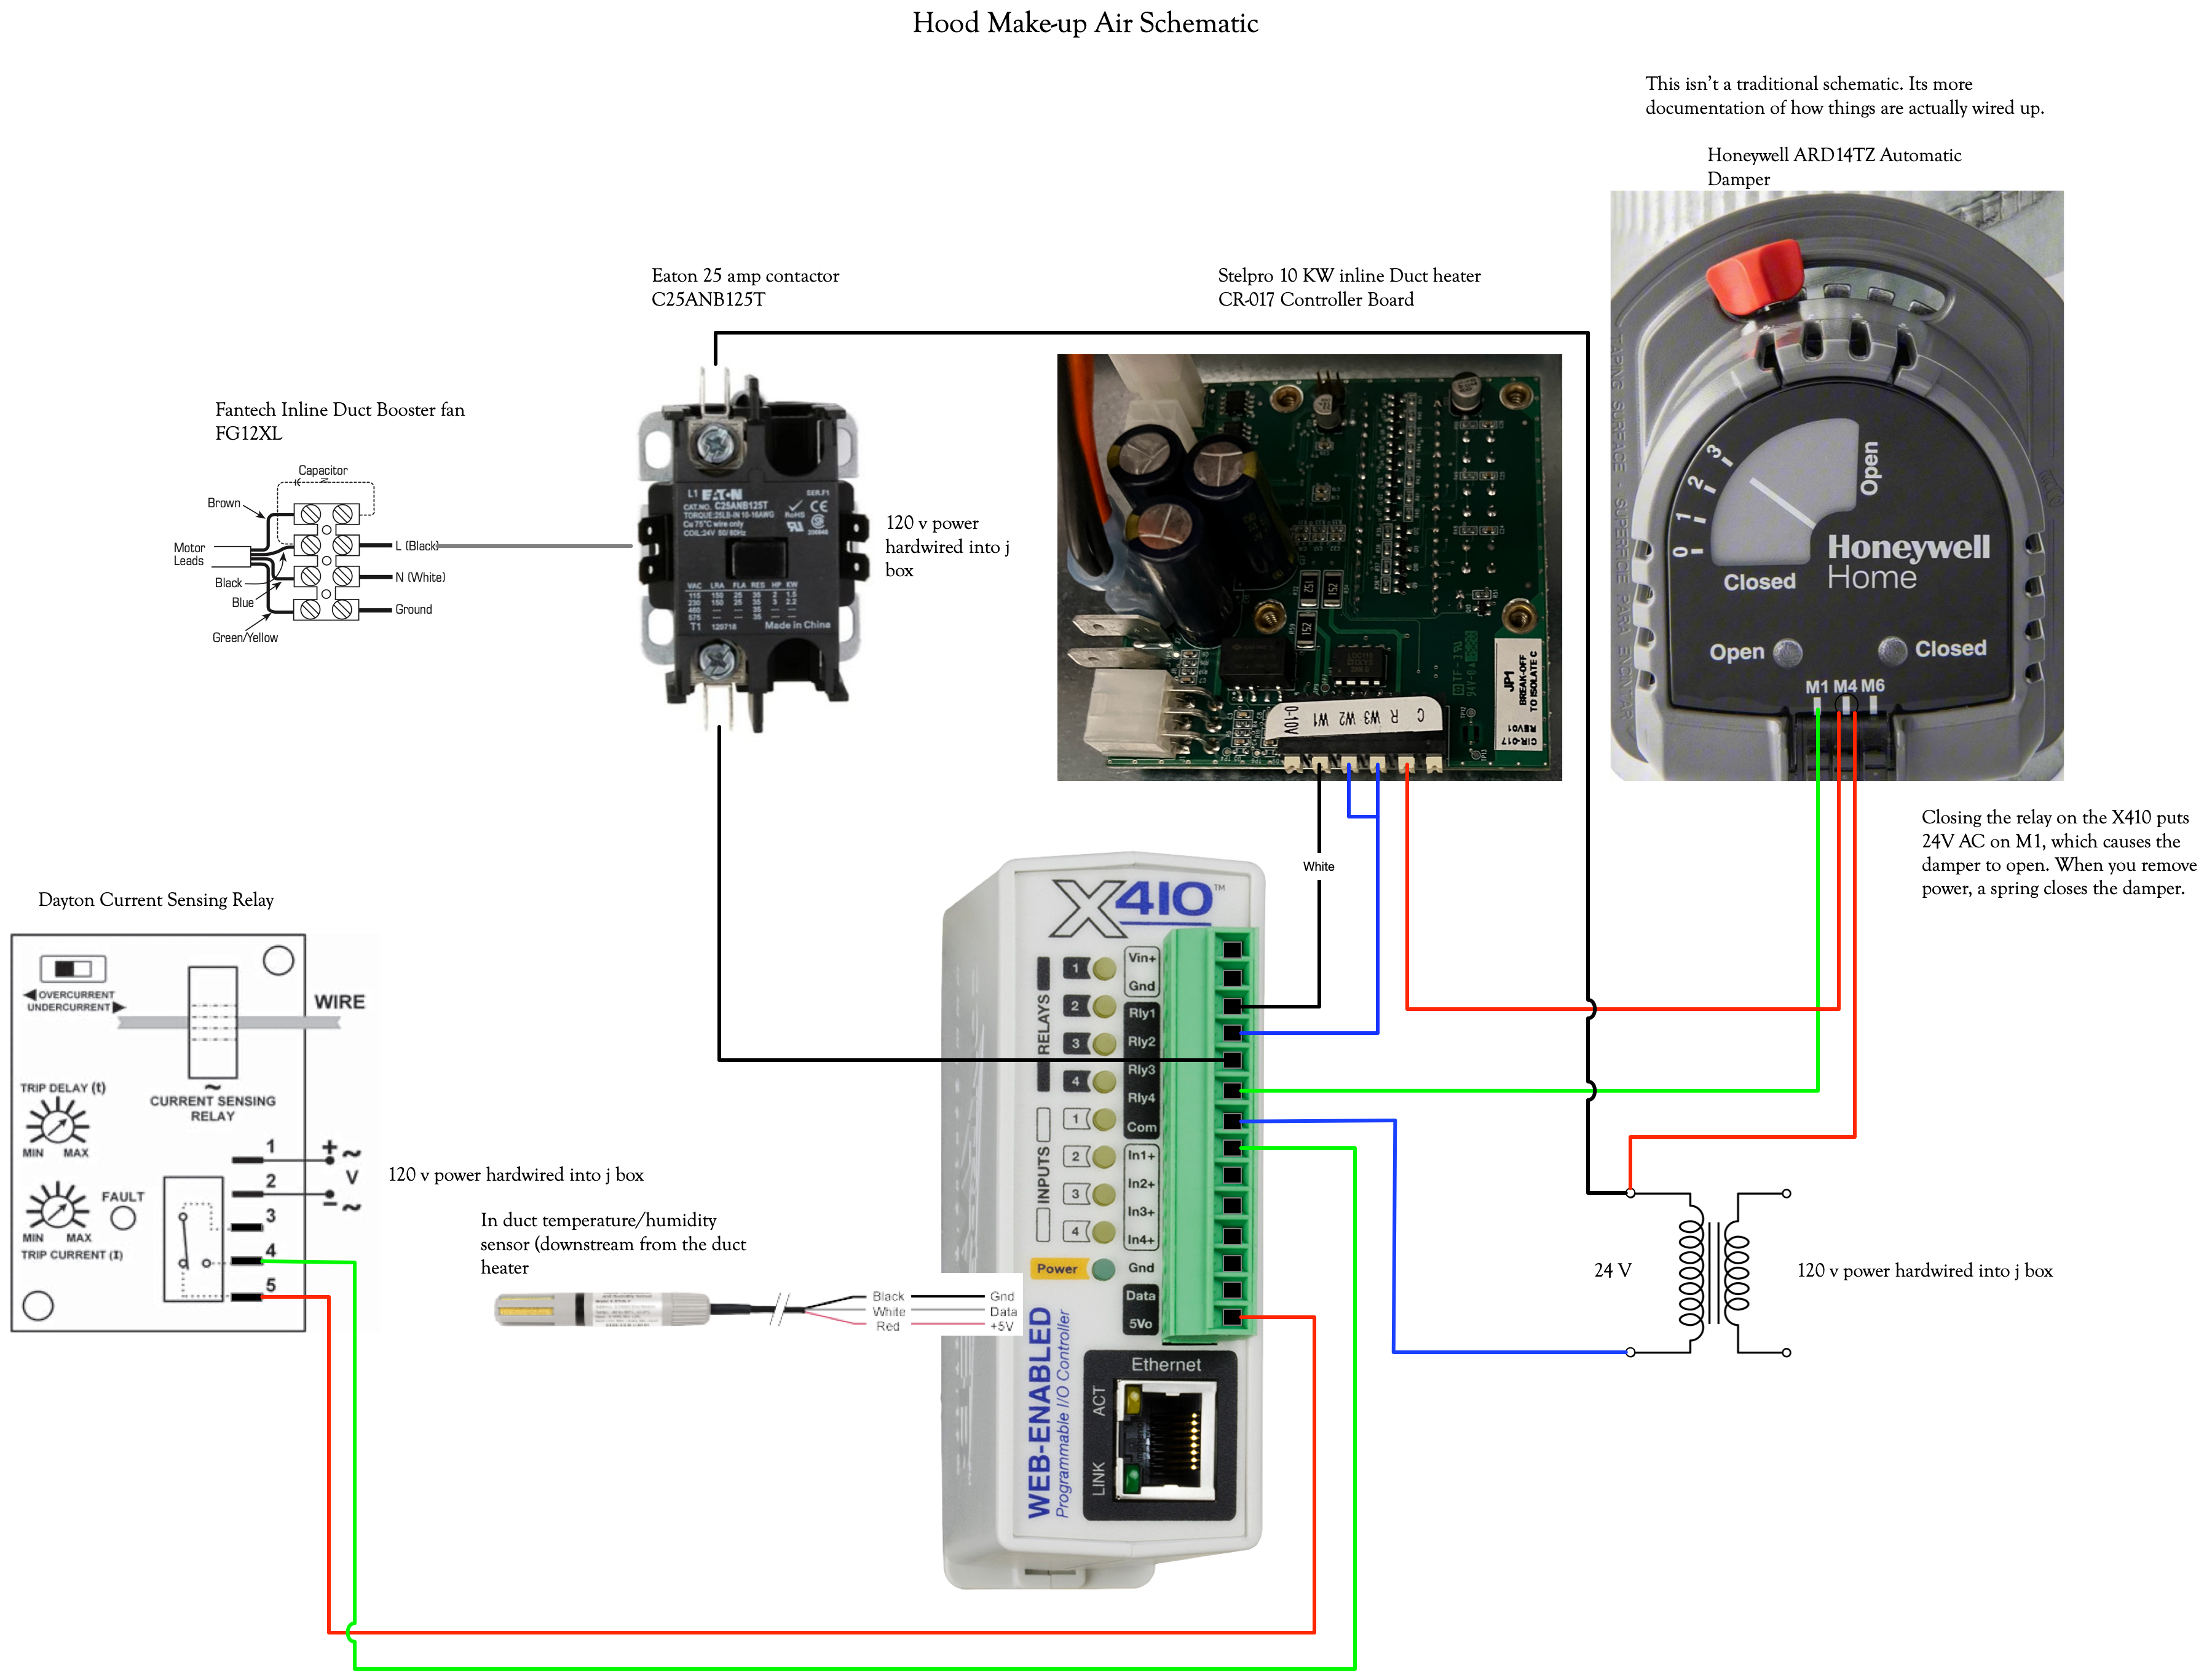
Here’s how it’s all connected together. The wire on the current sense relay is the neutral return from the on the roof exhaust fan. It’s actually passed thru the detector loop twice because, at the lowest setting, it’s only pulling about 0.4 amps which is what the current detector’s minimum single pass thru the detector loop can see. This makes sure that we’ll see the exhaust fan go on no matter how low it’s set to.
Since we could only get a 120 volt booster fan and the X410 has only low voltage relays the big contactor had to be added.
The duct heater is actually a three stage beast, but I was out of relays on the X410, so I have to drive stages 2 and 3 together as just heater high.
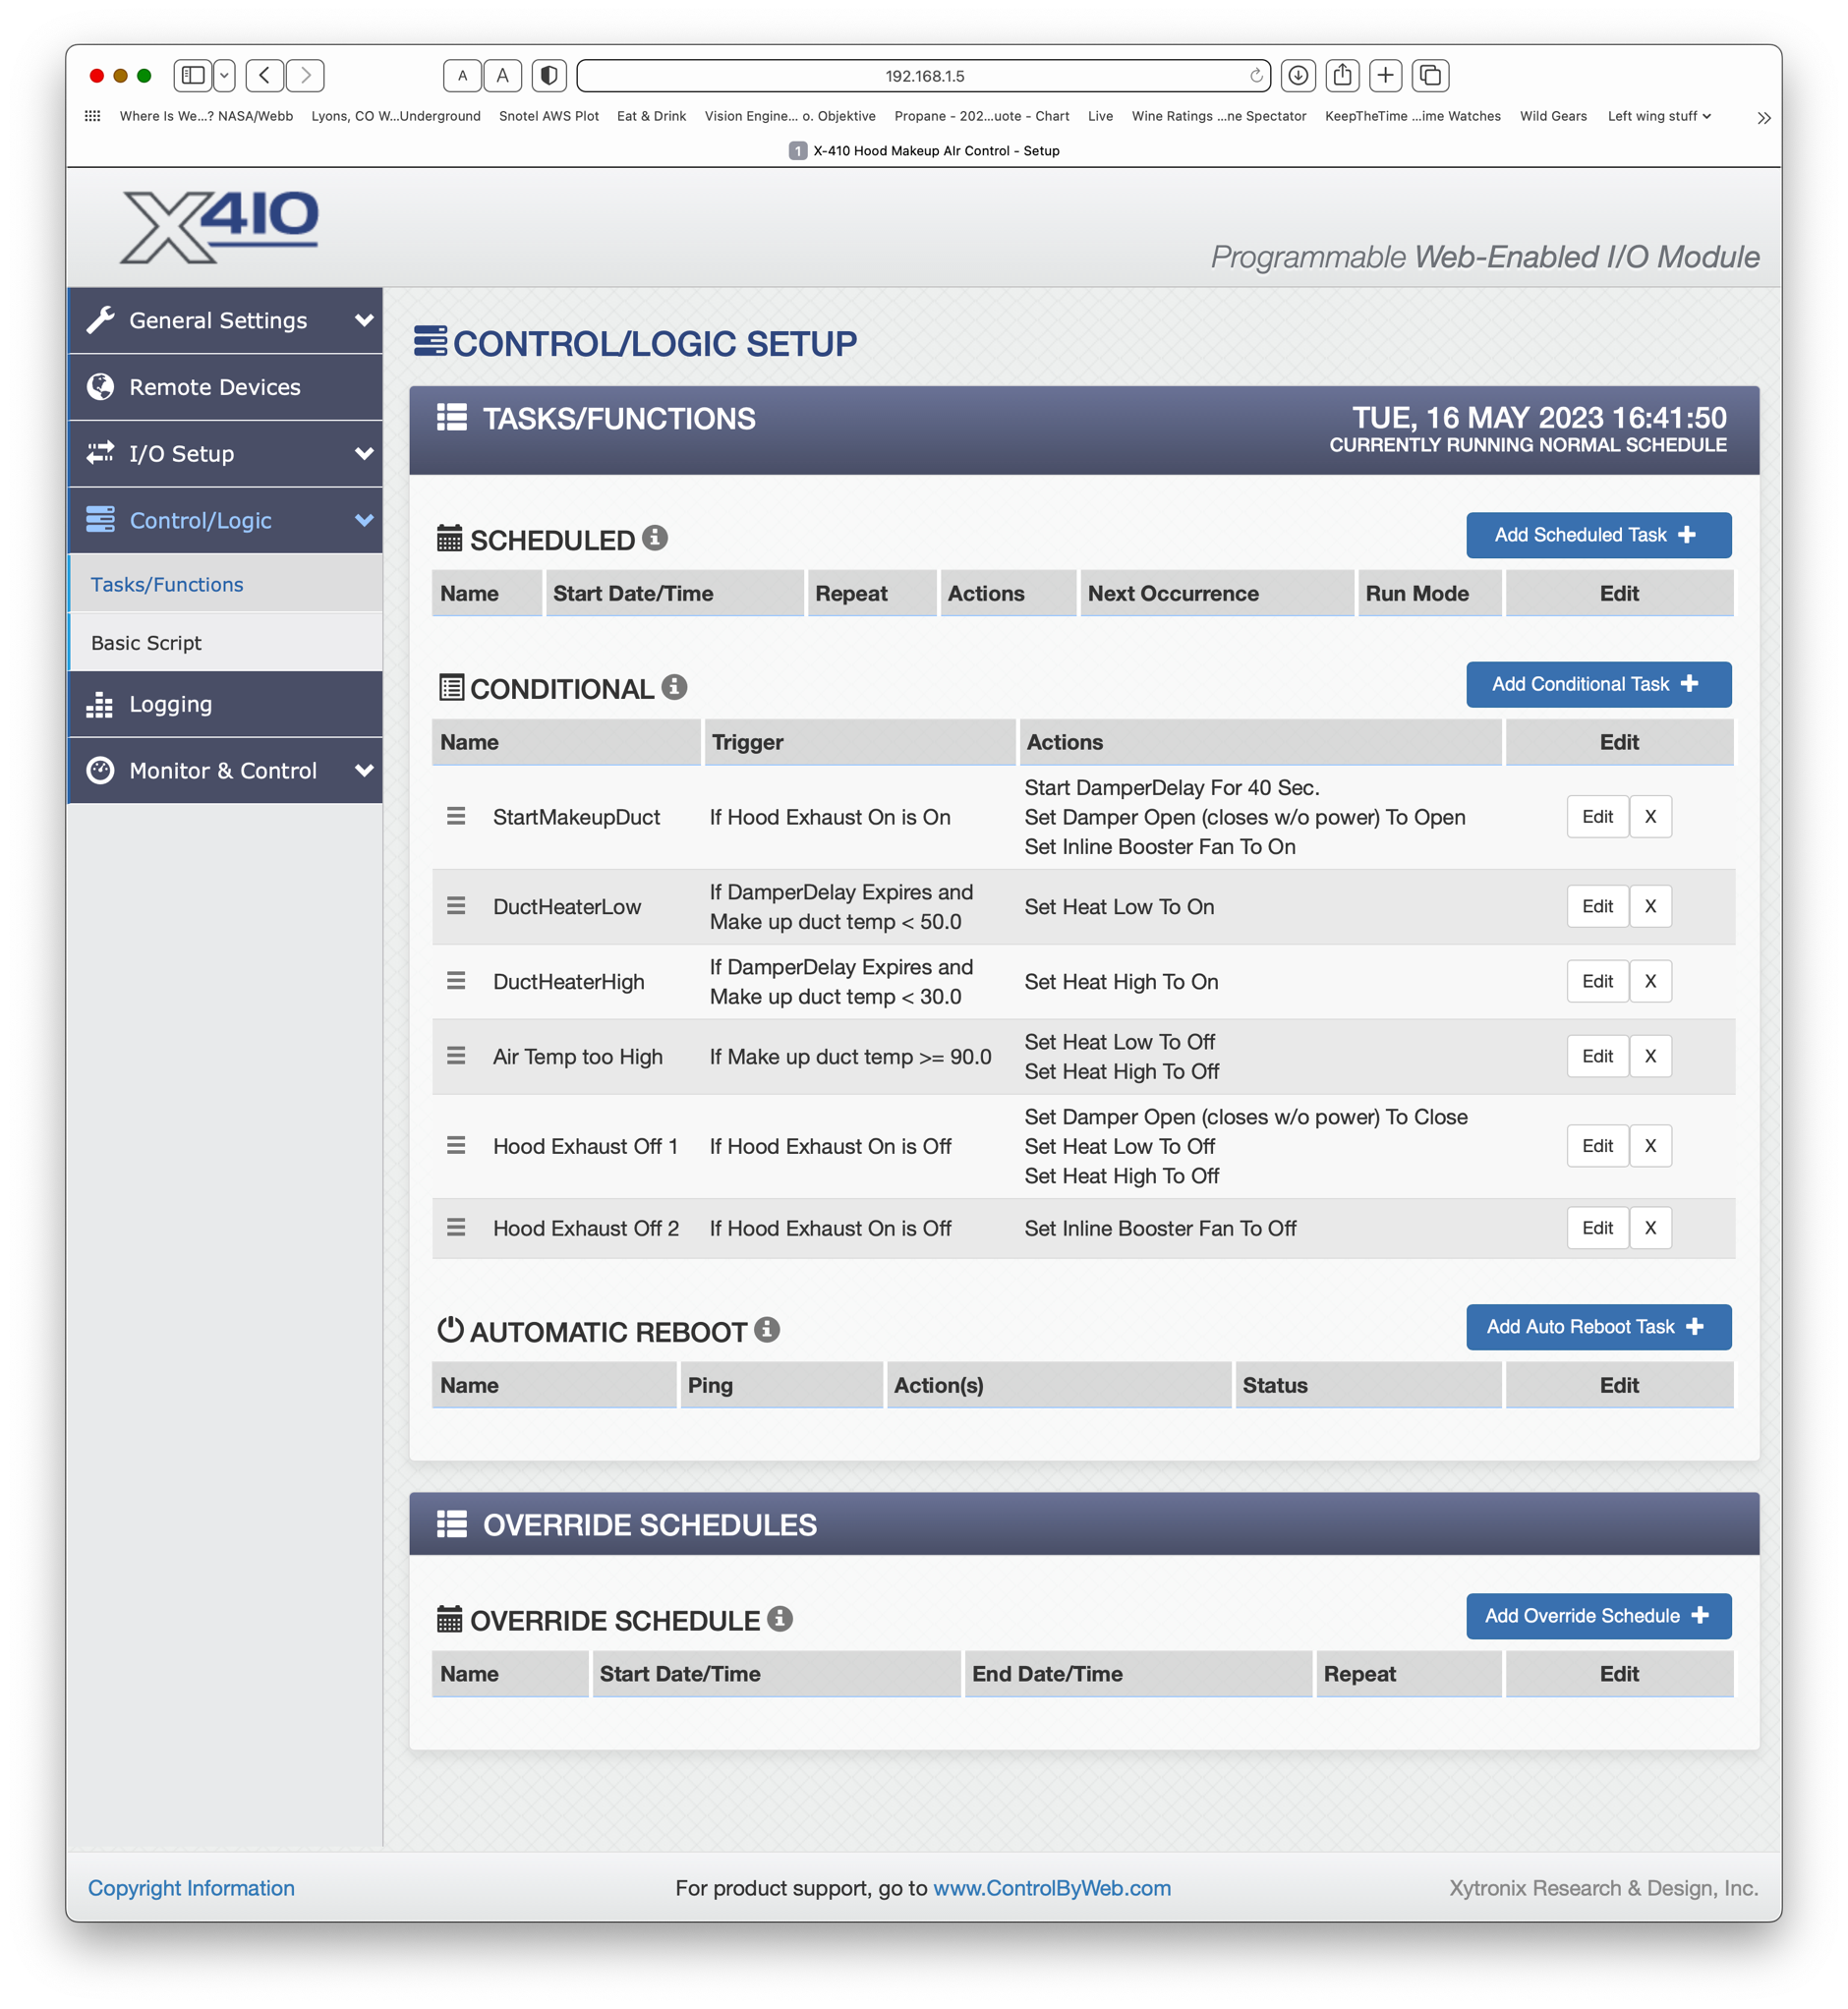
Here’s how the X410 is programmed. The current sense relay is connected to a digital input on the X410 that we labeled as “Hood Exhaust On”. When it sees the state of that input go from off to on, everything gets started. The damper takes about 35 seconds to go from closed to open, so we don’t try to start the heater for 40 seconds after we command the damper to start opening.
One limitation of the X410 is that you can only have 3 actions per conditional task, so there are two shutdown tasks to handle the 4 actions needed to shut the system down.
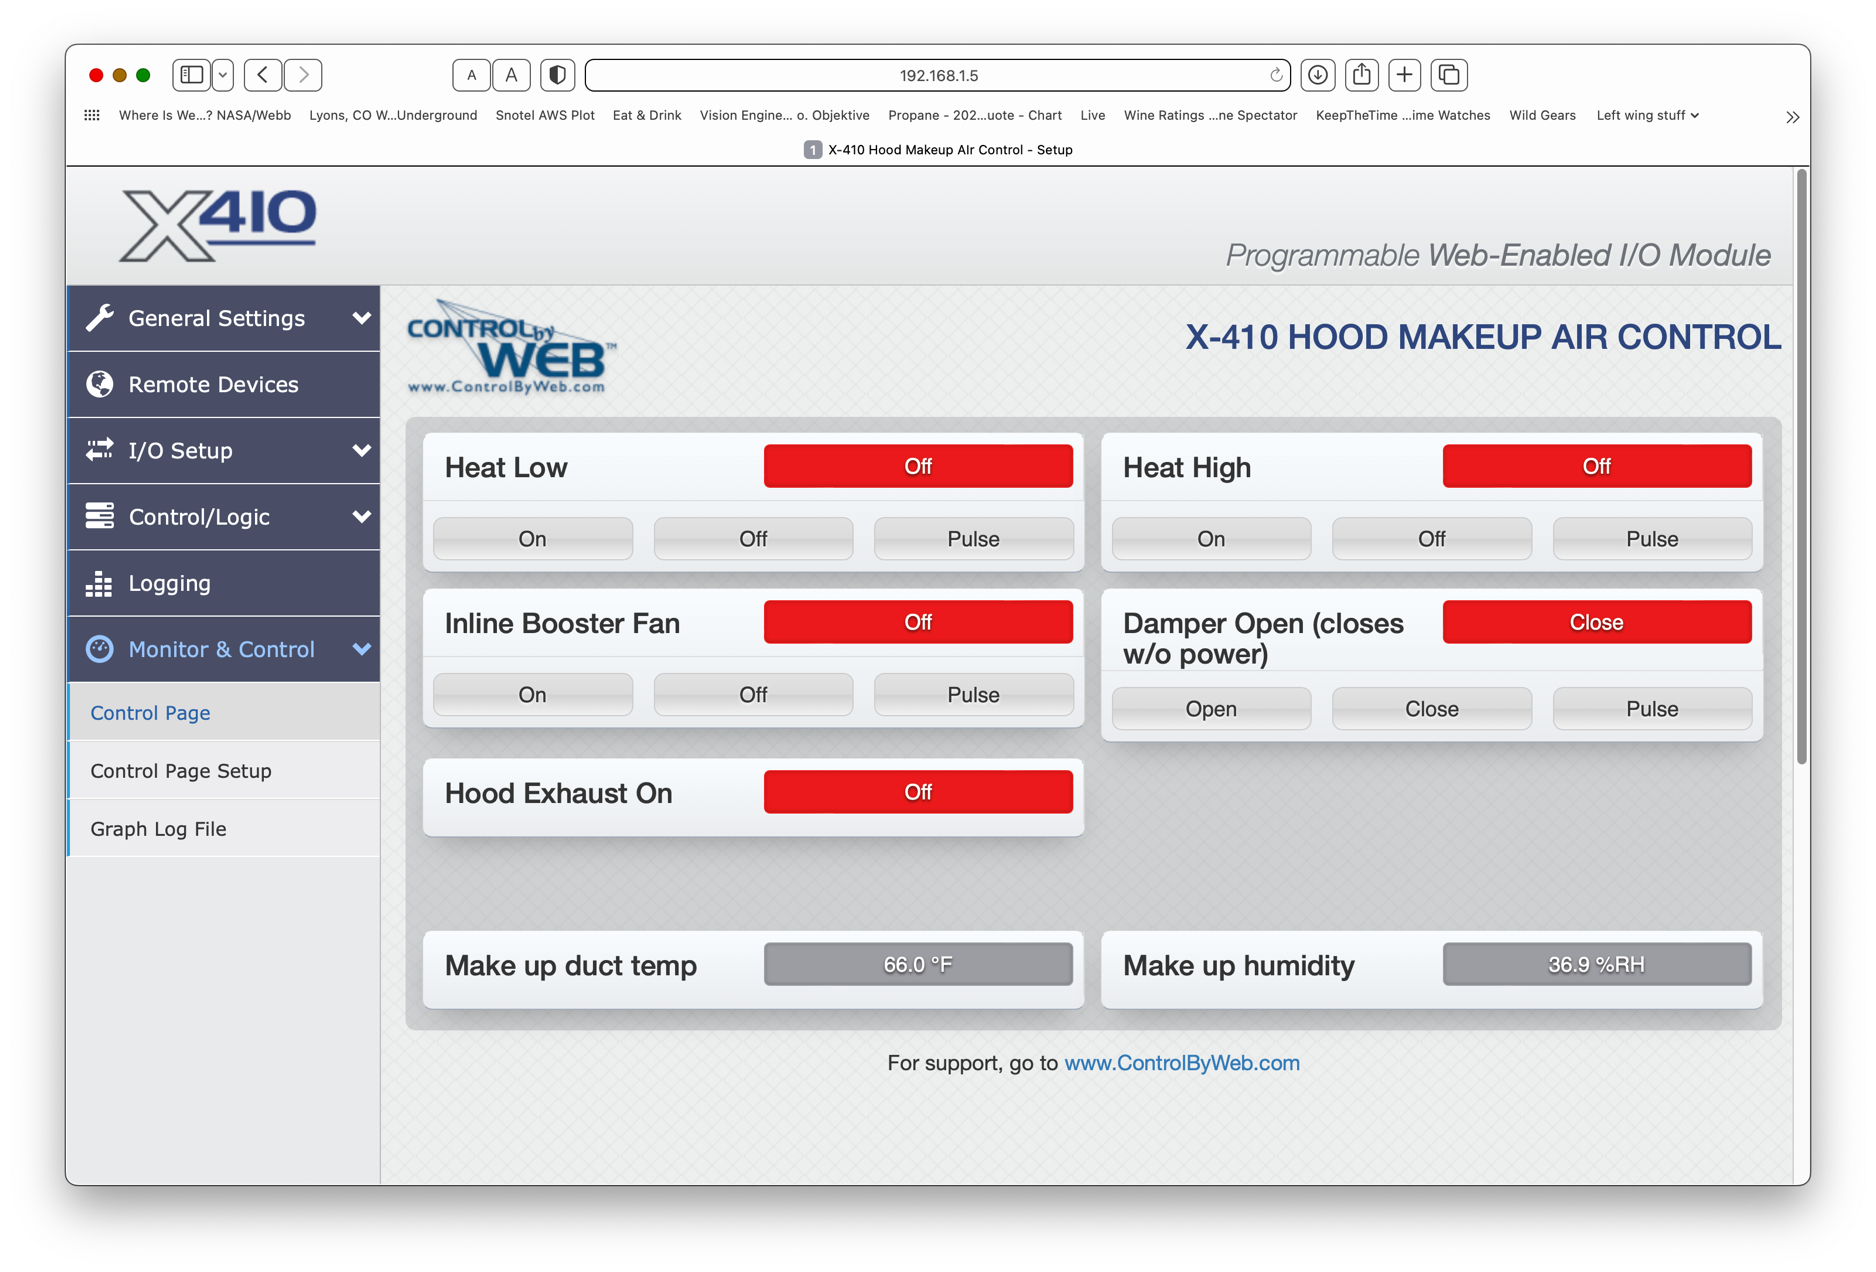
This is what you see normally, the X410’s monitoring and control screen. Here it is with the fan turned off.
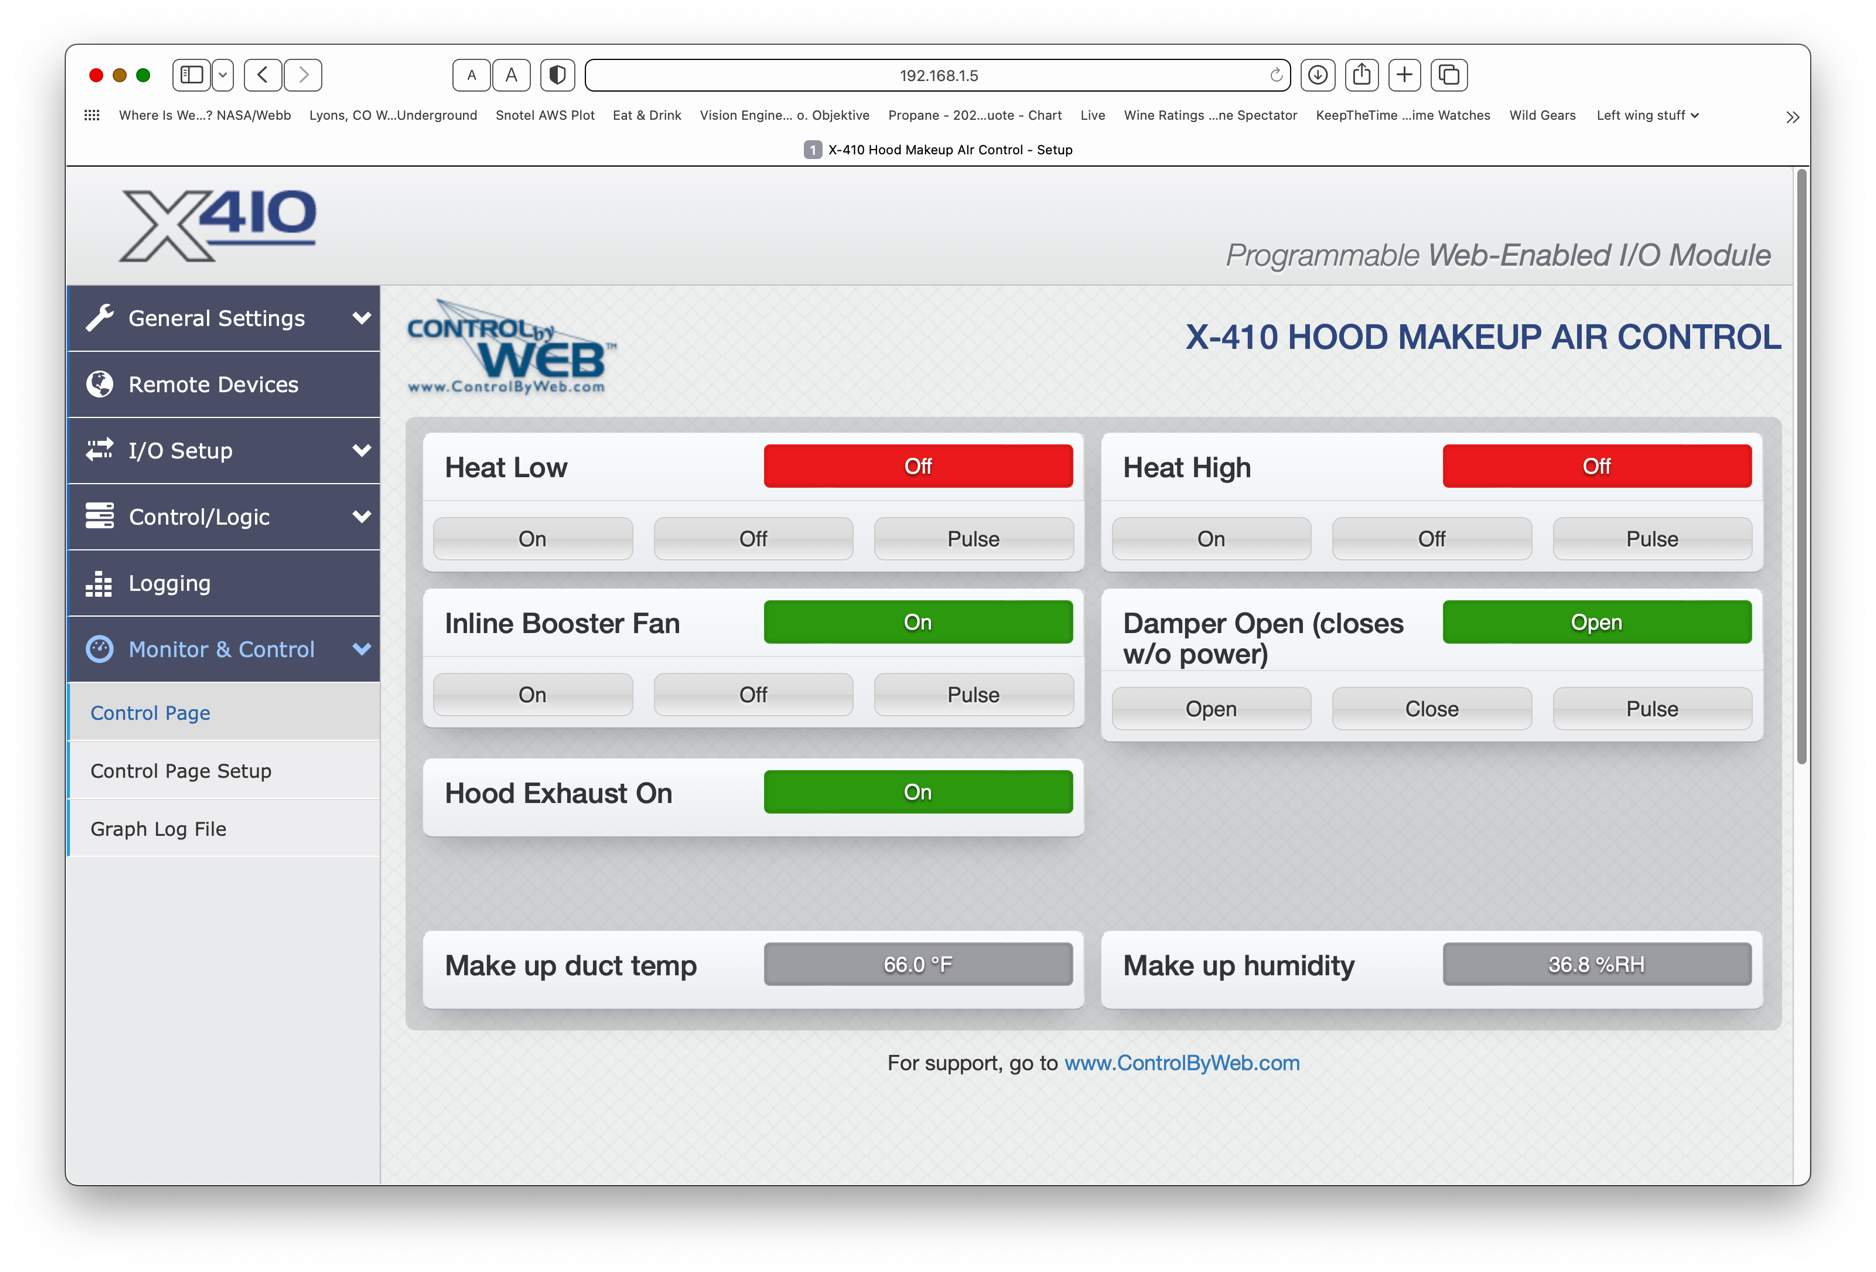
And with the hood exhaust fan on.