March 15 - 19, 2023 or so
Well, the scratching around was interesting, but Martin wanted to do a really spectacular one that he’d had in mind for some time - Explosion 1.
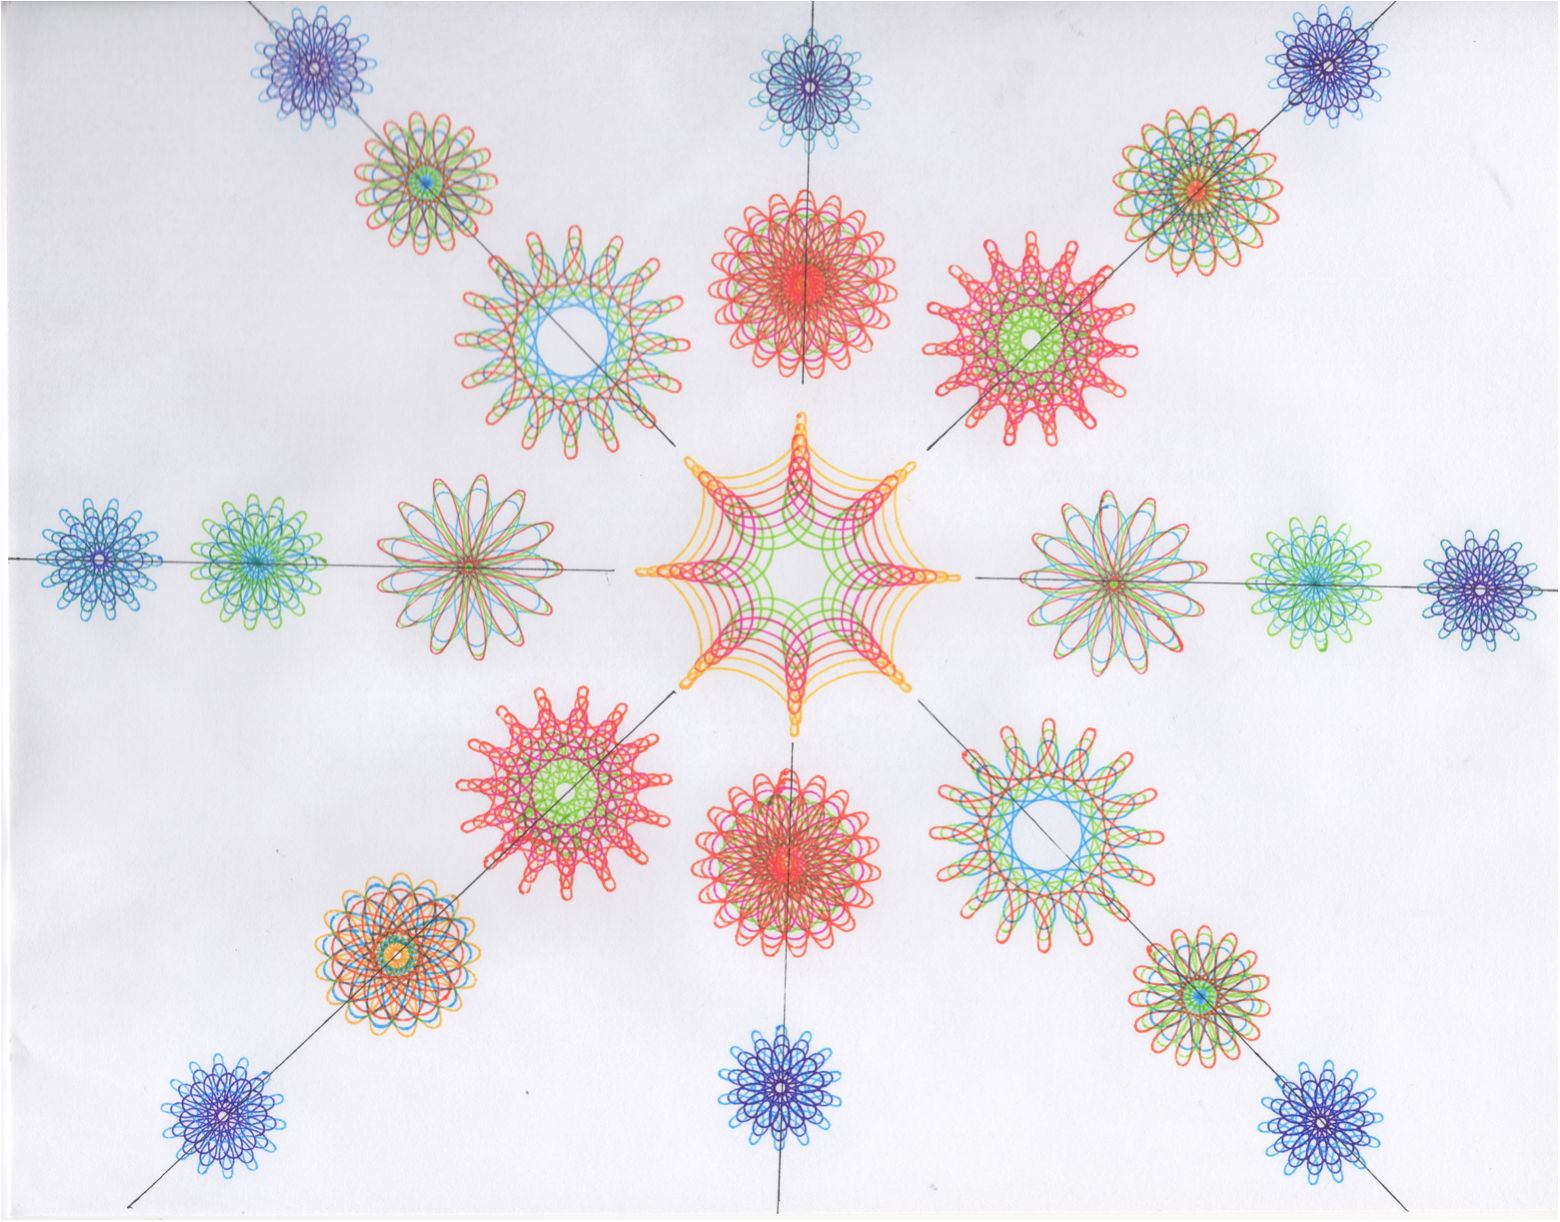
Gasp, wheeze, major exhaustion, and a lot of confusion! The black lines were drawn with a straight edge after the center pattern was drawn. The trouble was, I wanted quite a bit of symmetry and that takes a lot of planning. If you want the full size Explosion 1, just click on the picture.
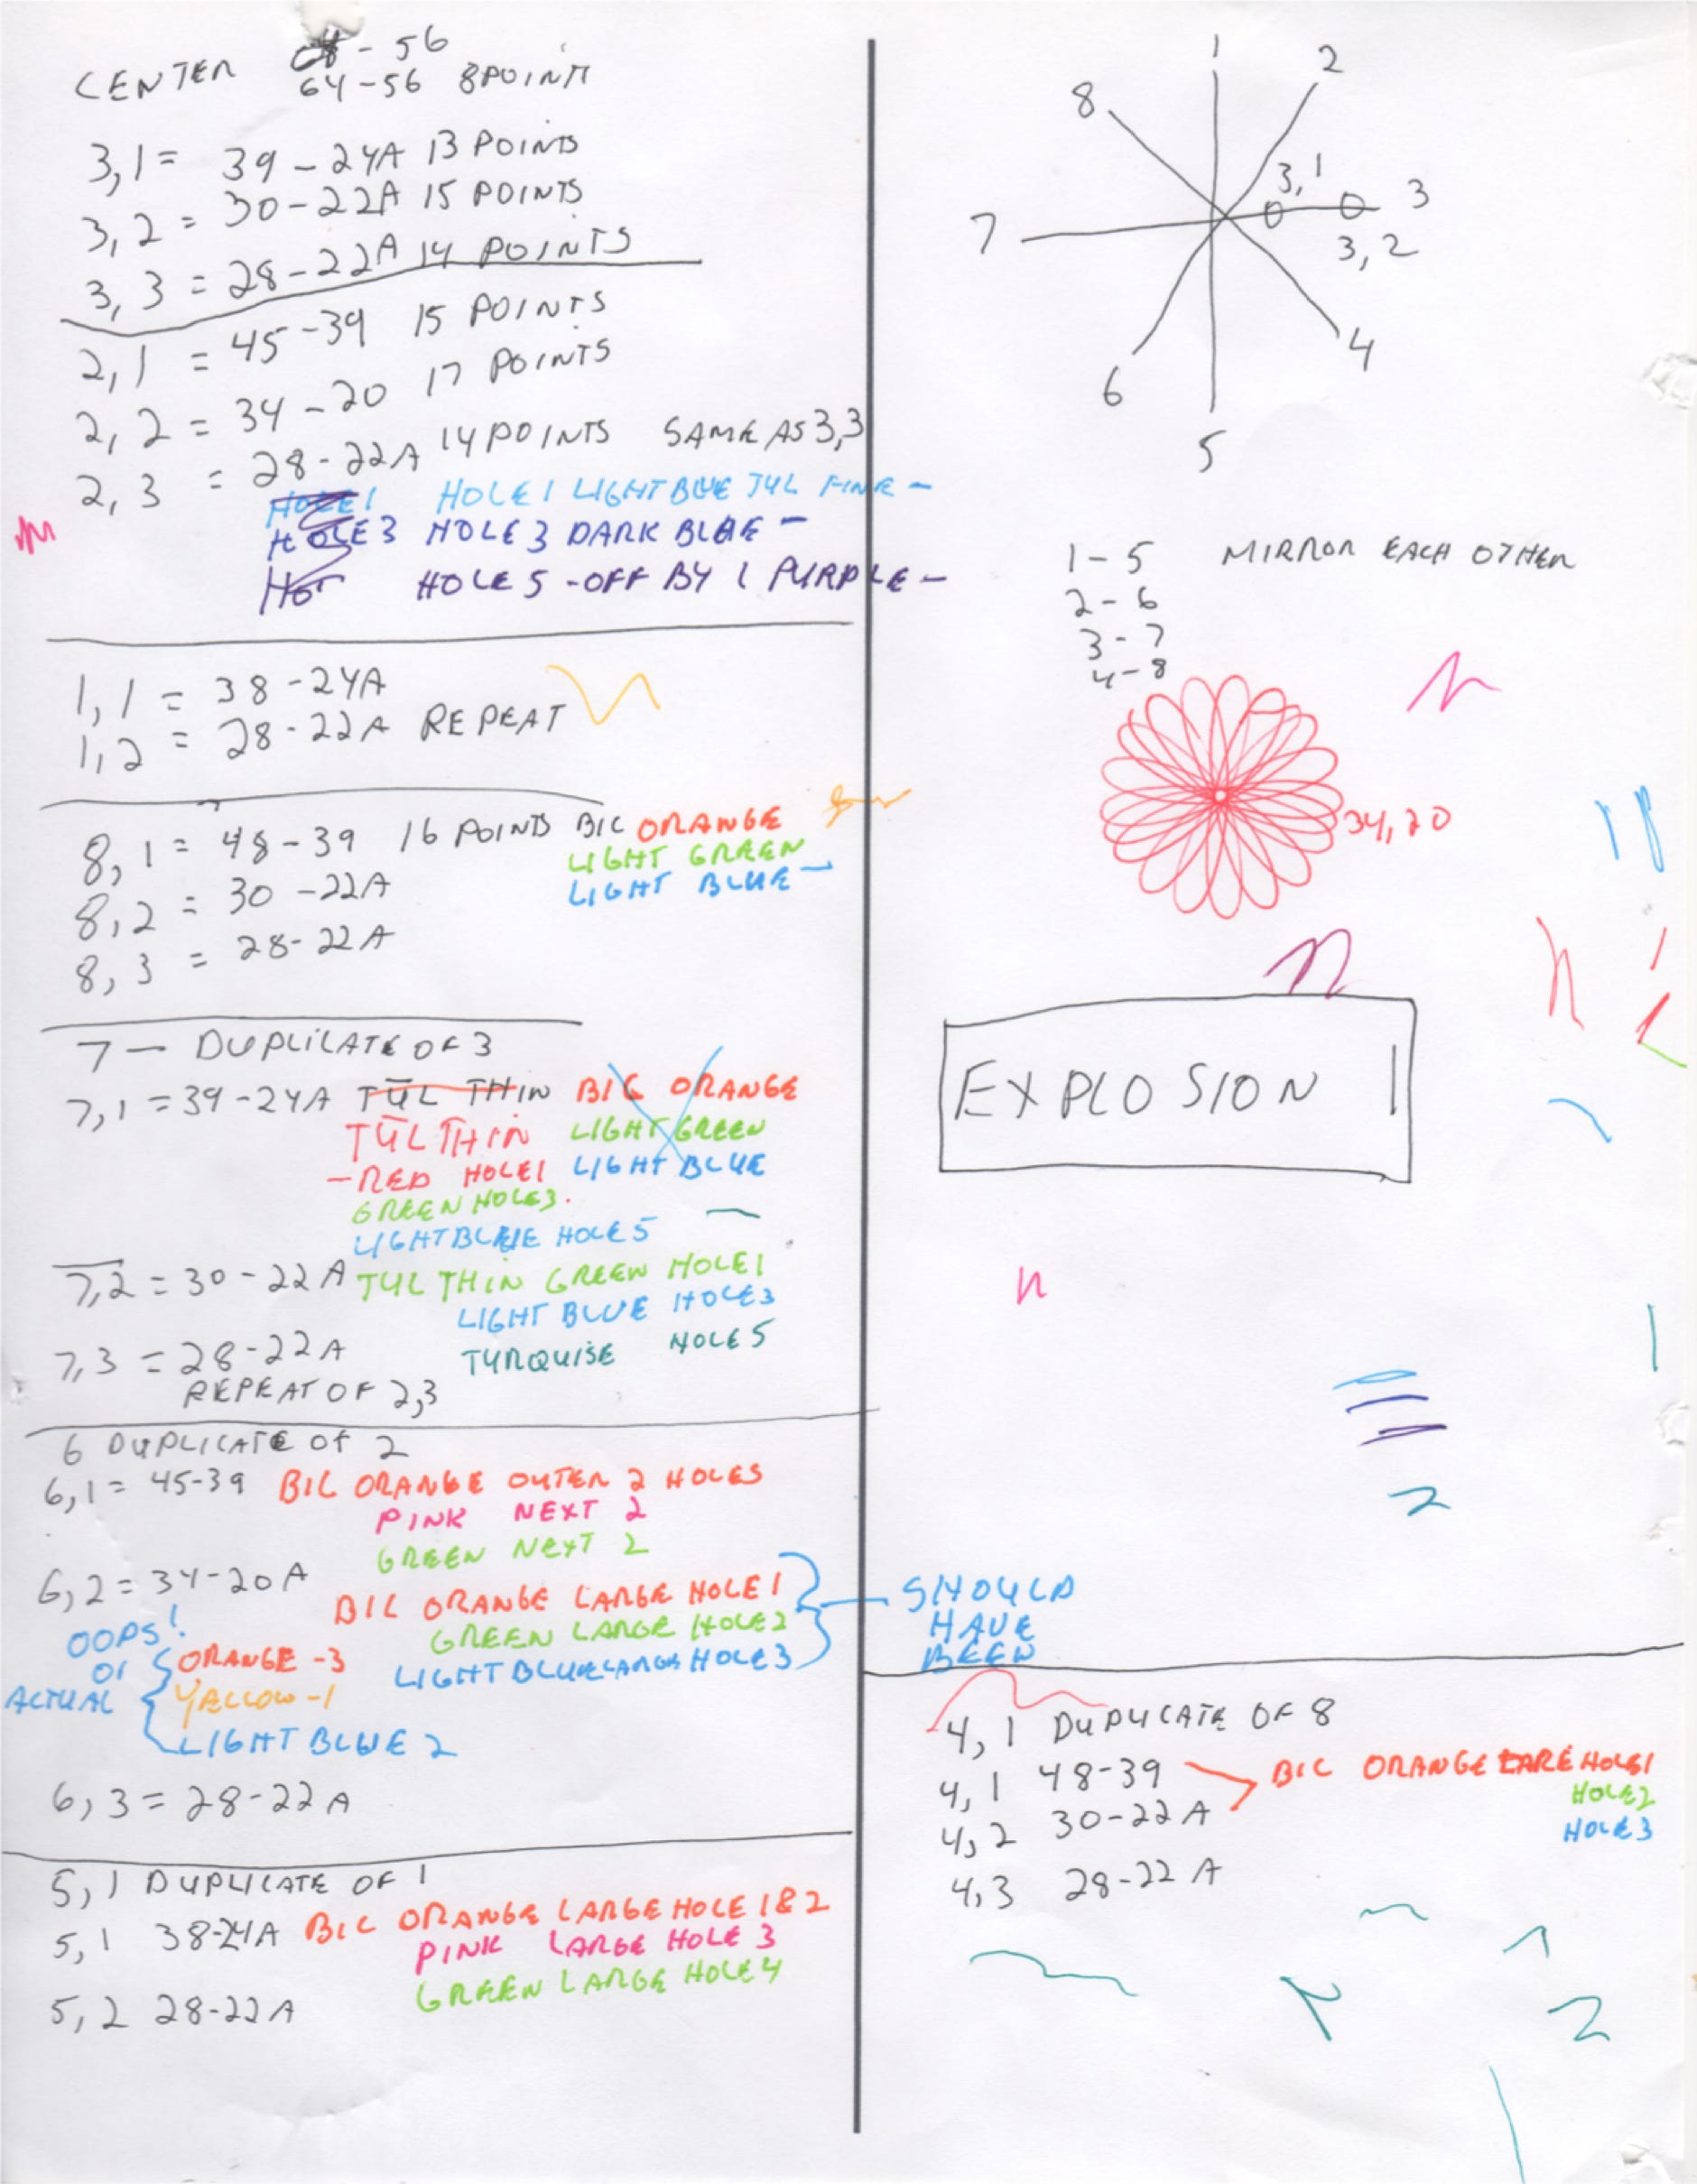
Above is the original “plan”, actually more of a “Try to Capture what I’m doing” thing. At the top right are the pattern numbers. All in all, this is not the way to go! Back to the old fiasco hatchery to come up with something better!
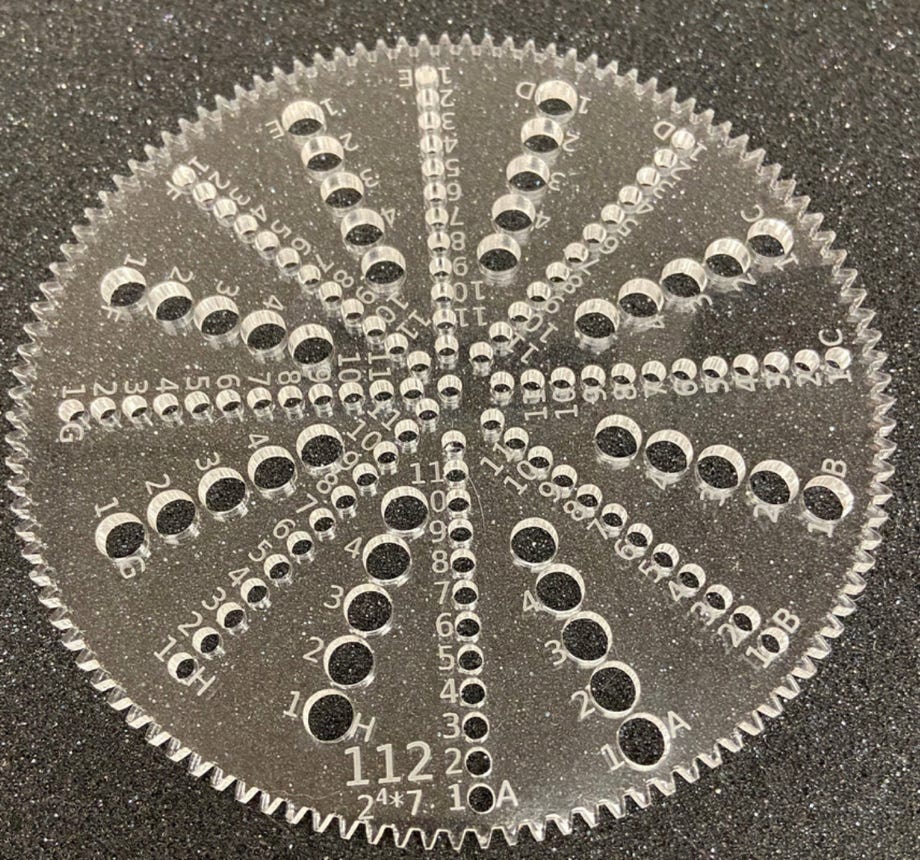
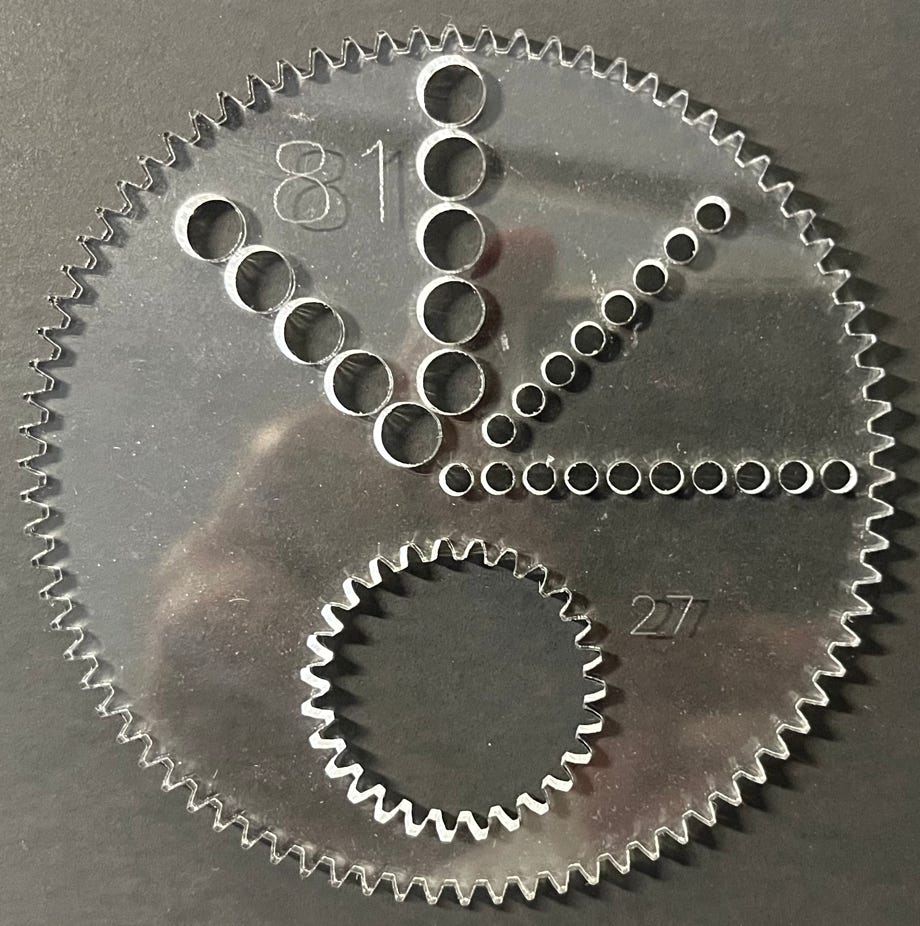
First thing we have to do is lockdown the nomenclature we’re going to use for the holes. The older gears (on the right)that we mostly have aren’t labeled, but we can use the same nomenclature as the newer gears like the 112 on the left. The 112 is the most extreme gear currently available, as described on the website: “An experiment in double-double dense pen holes of each size. Eight columns of each size labeled A through H give possible step sizes even smaller than those of double dense pen holes.” So, we’ll follow that. The line of holes with its outermost hole nearest the edge of the gear will be row A. Then as the line’s outmost holes step farther away from the edge, they’ll be given letter designators.
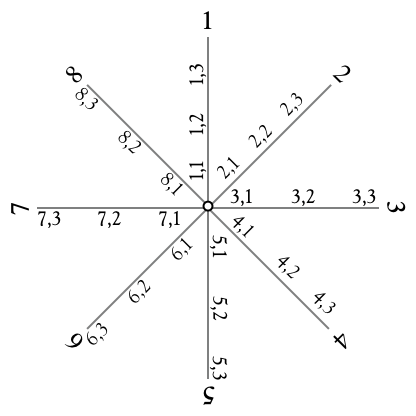
Next thing - each pattern has to have a “name” as shown above
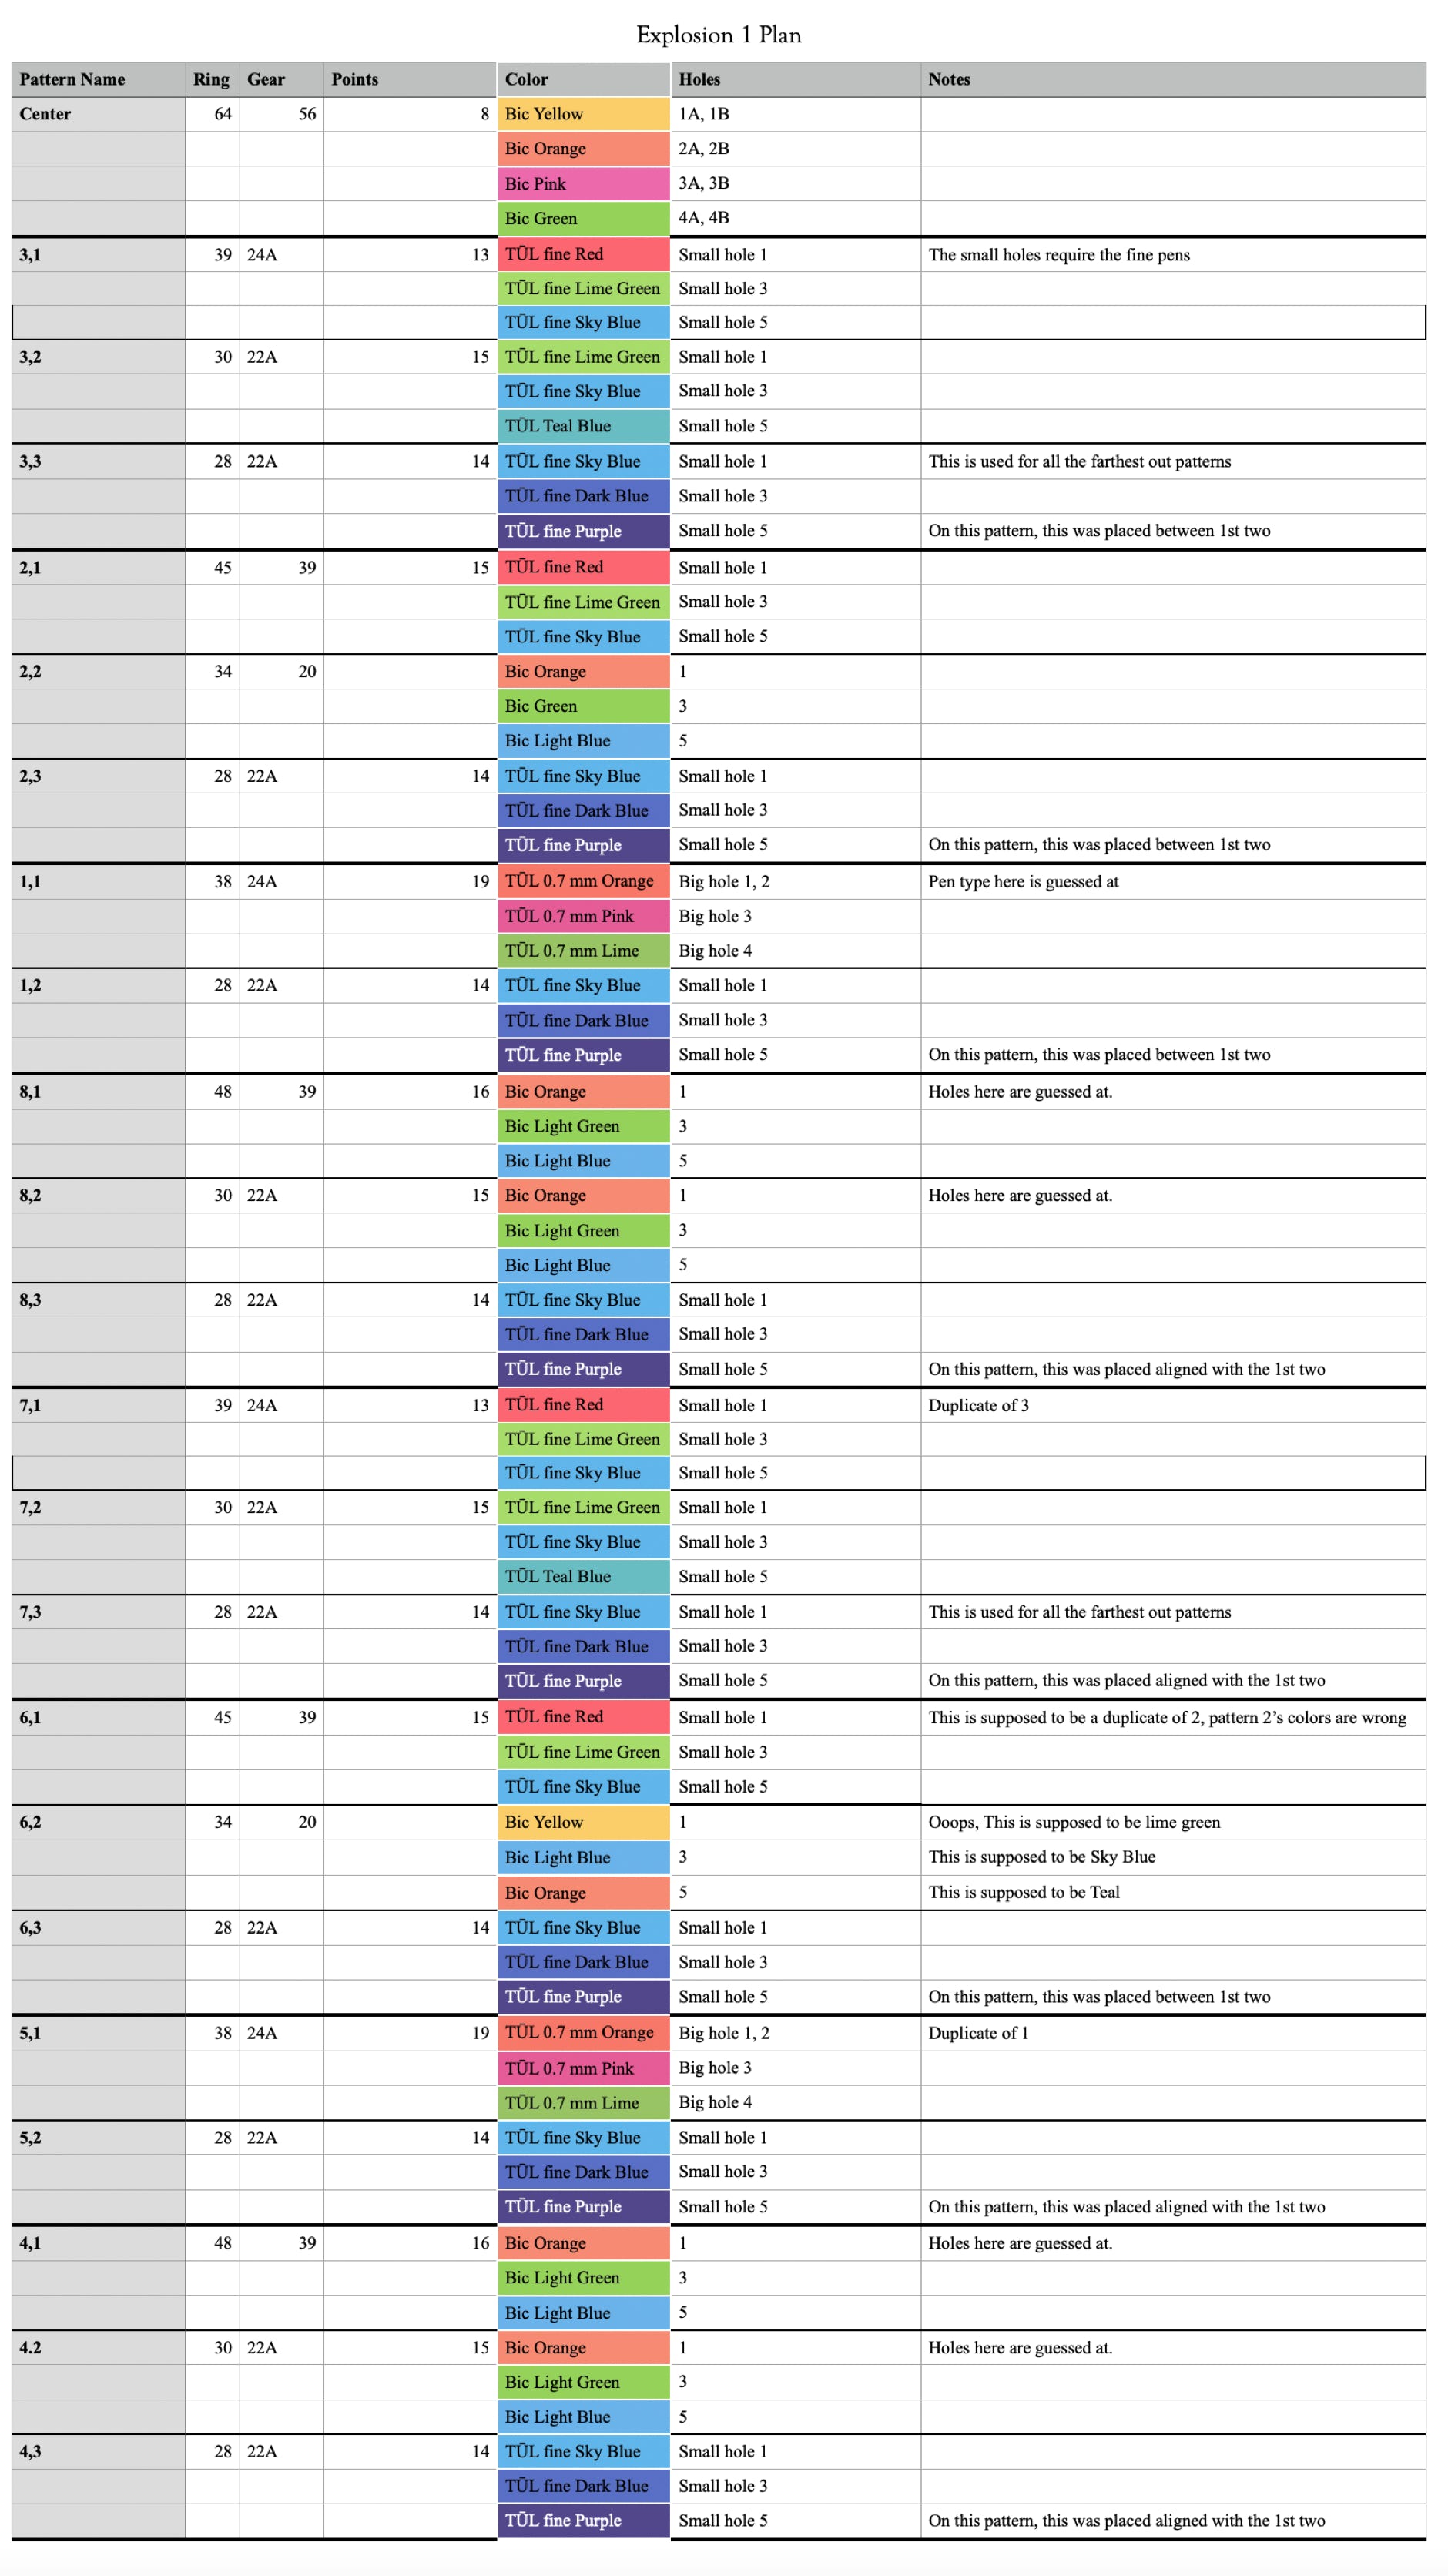
We liked the original sketch having the colors and all the patterns stacked tightly together, so we kept those ideas in the planning spreadsheet.
Now we can have as many identical patterns as we want because we know exactly how to make them!